AI Artificial Intelligence Kit User Manual V1.0
Safety Precautions
- Read this manual carefully before use and operate under teacher supervision.
- Install batteries with correct polarity to avoid short circuit, overcharge, or high temperature.
- Do not touch motors and wheels while powered on to prevent injury.
- The AI Vision Mainboard is a precision electronic device; avoid dropping or water immersion.
- Disconnect the battery after experiments and store properly.
Kit Contents
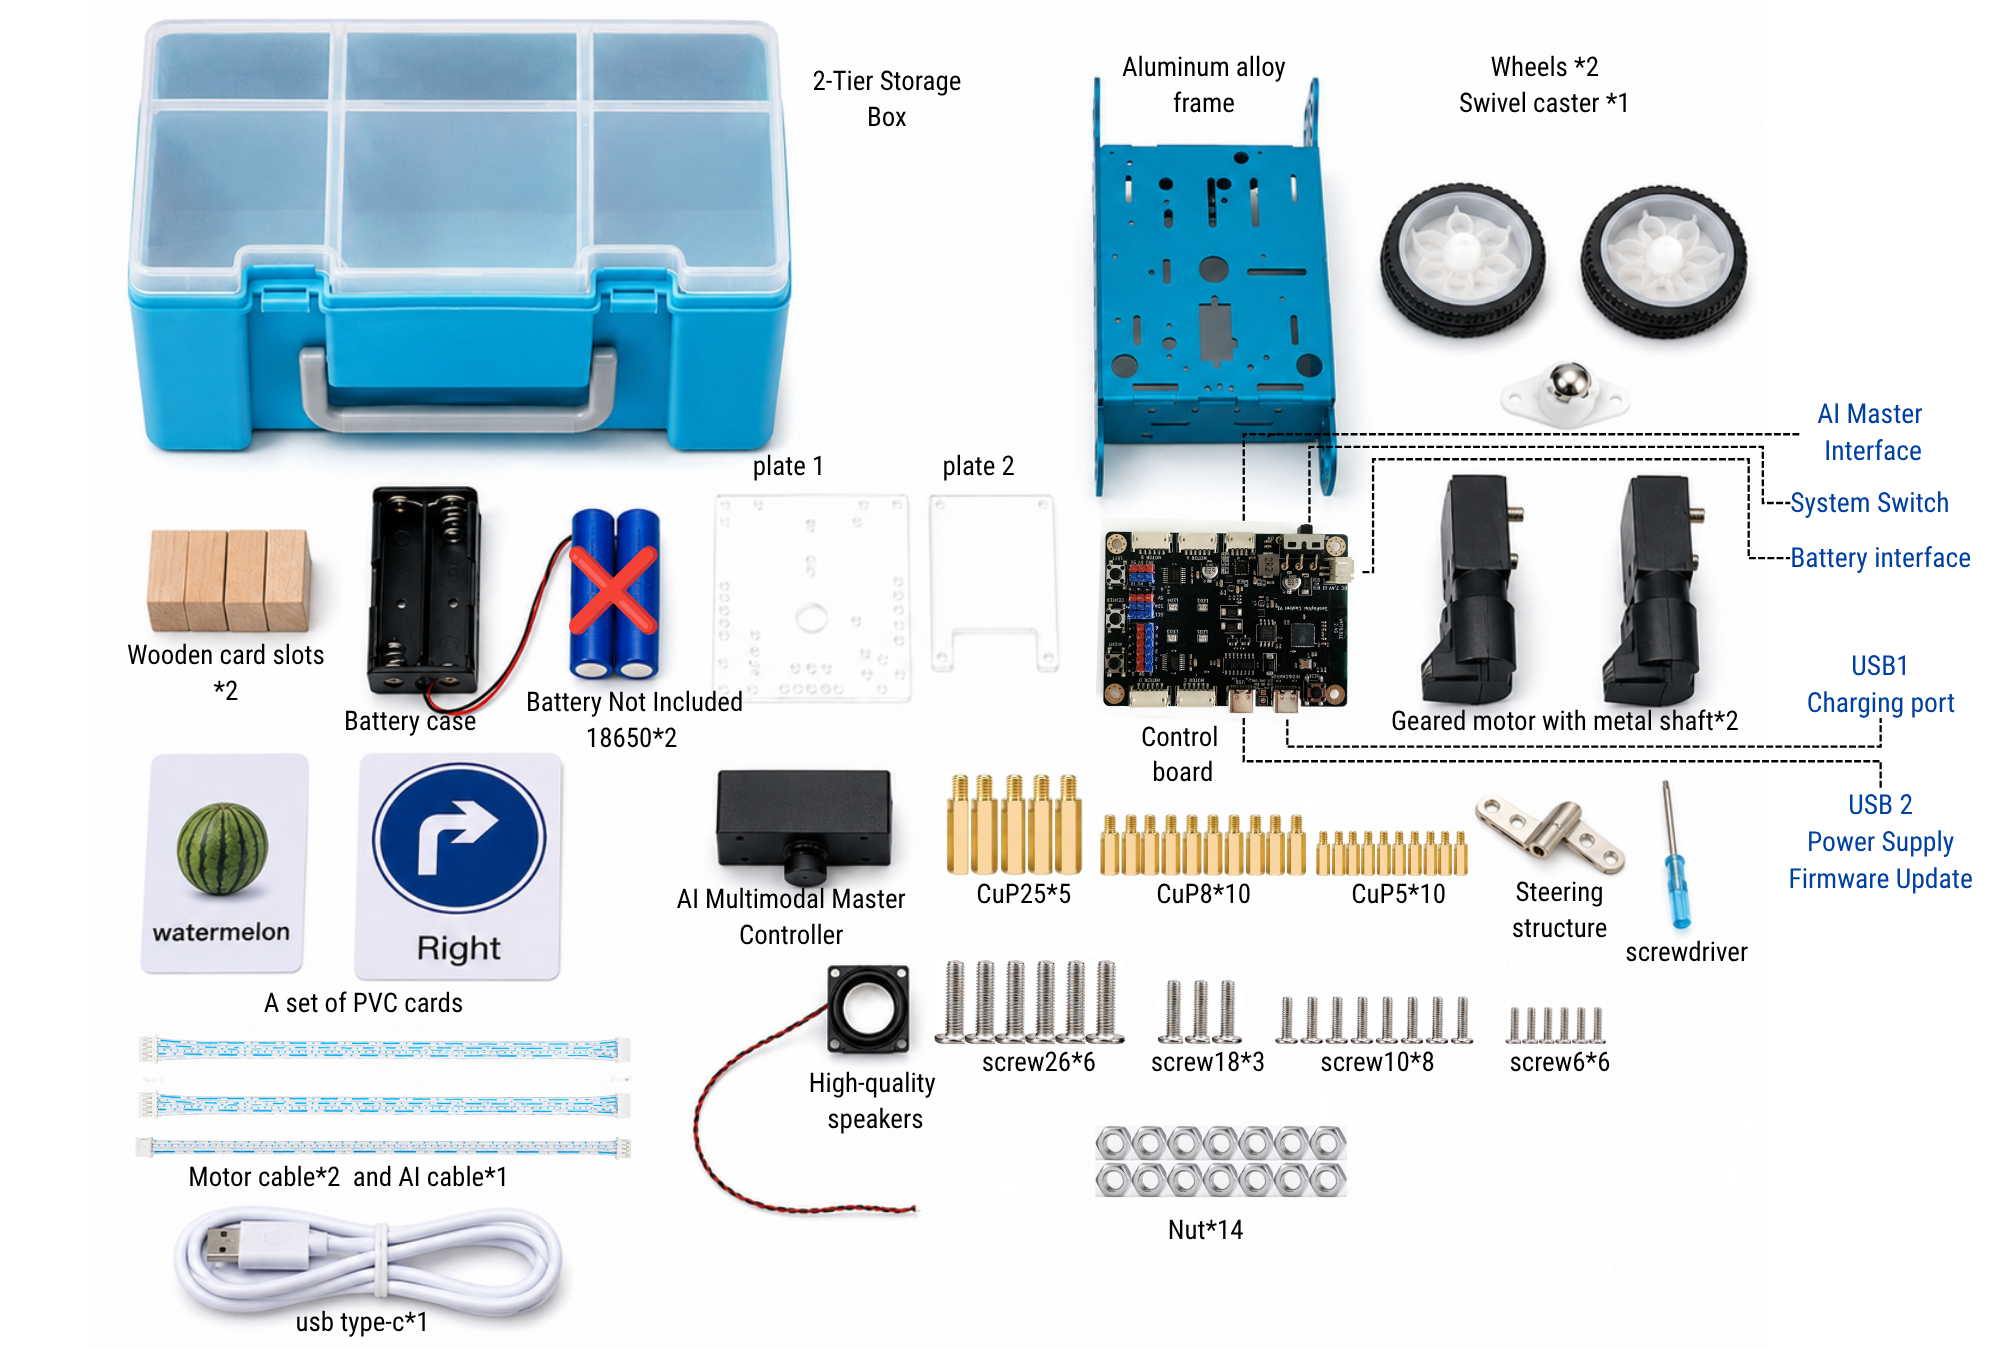
Hardware Introduction
3.1 AI Vision Mainboard
The AI Vision Mainboard is the core of the kit, integrating a camera, AI processor, Wi-Fi/Bluetooth module, and audio interfaces. It can independently run models such as image classification, object detection, face recognition, and gesture recognition.
Interface Diagram (schematic):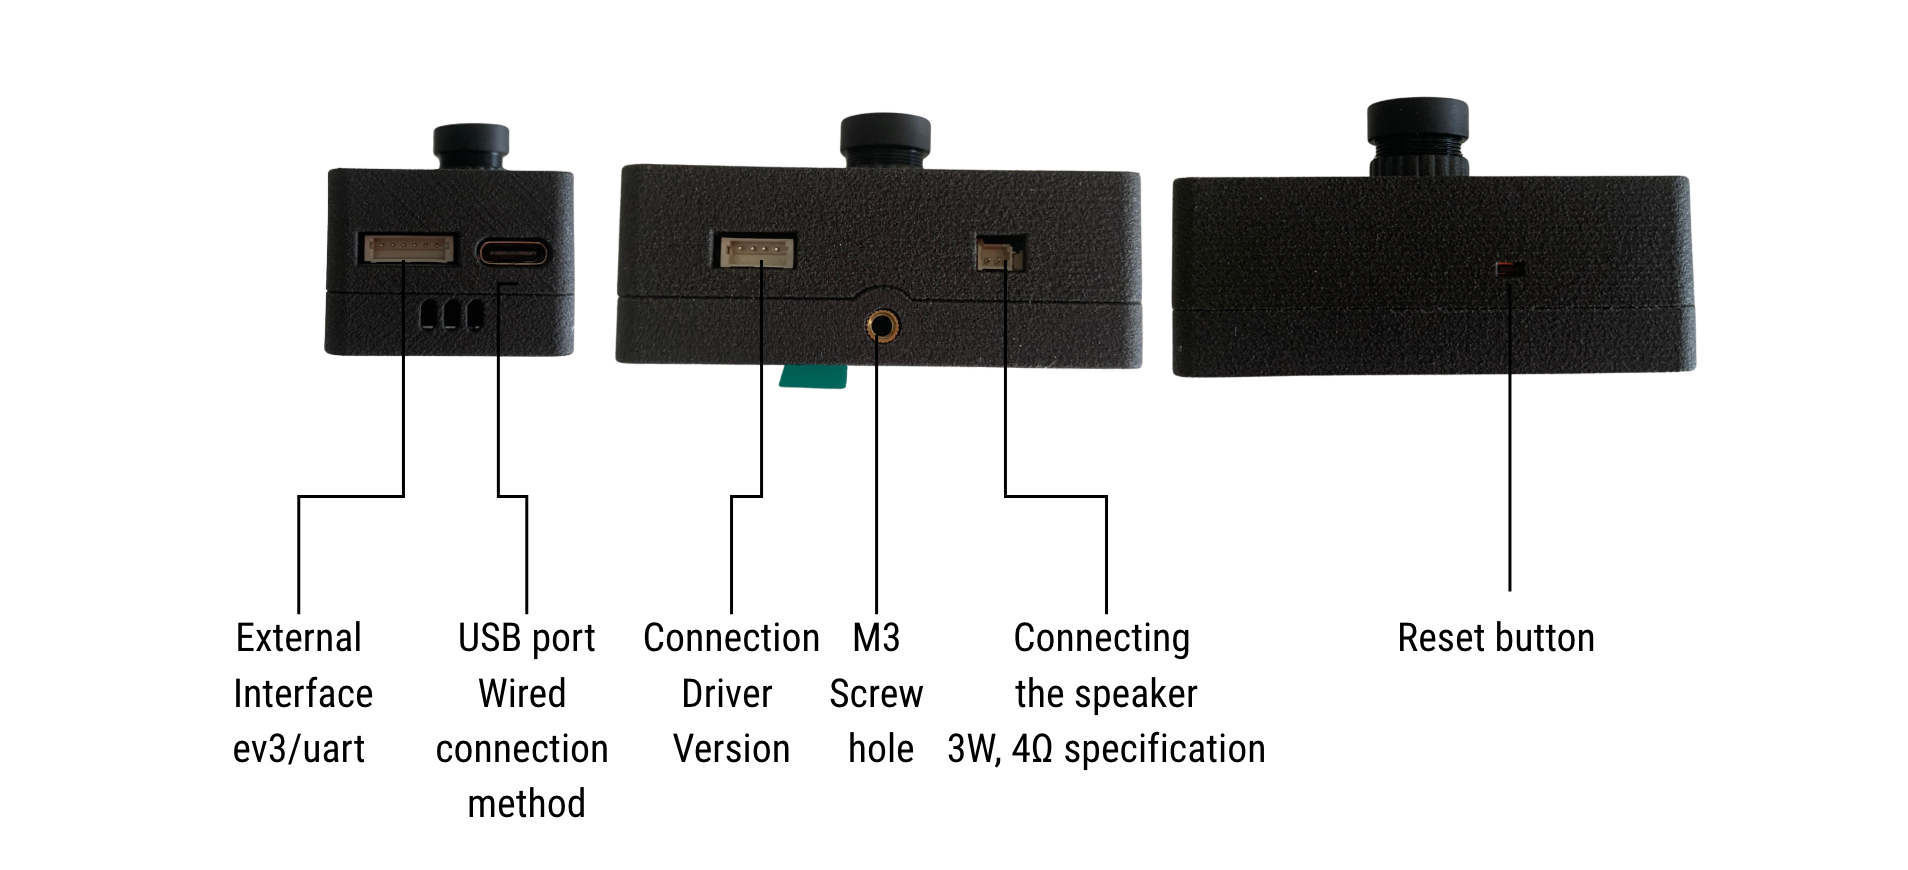
- USB-C Port: Power supply, programming, data transfer
- Camera: Front-facing, used for all vision tasks
- Speaker Jack: 3.5mm audio output or PH2.0 socket
- AI-Control Port: Connects to the Motor Driver Board via a dedicated cable
3.2 Motor Driver Board
The Motor Driver Board handles motor control and power distribution, receiving commands from the mainboard to drive two encoder motors.
Interface Diagram (schematic):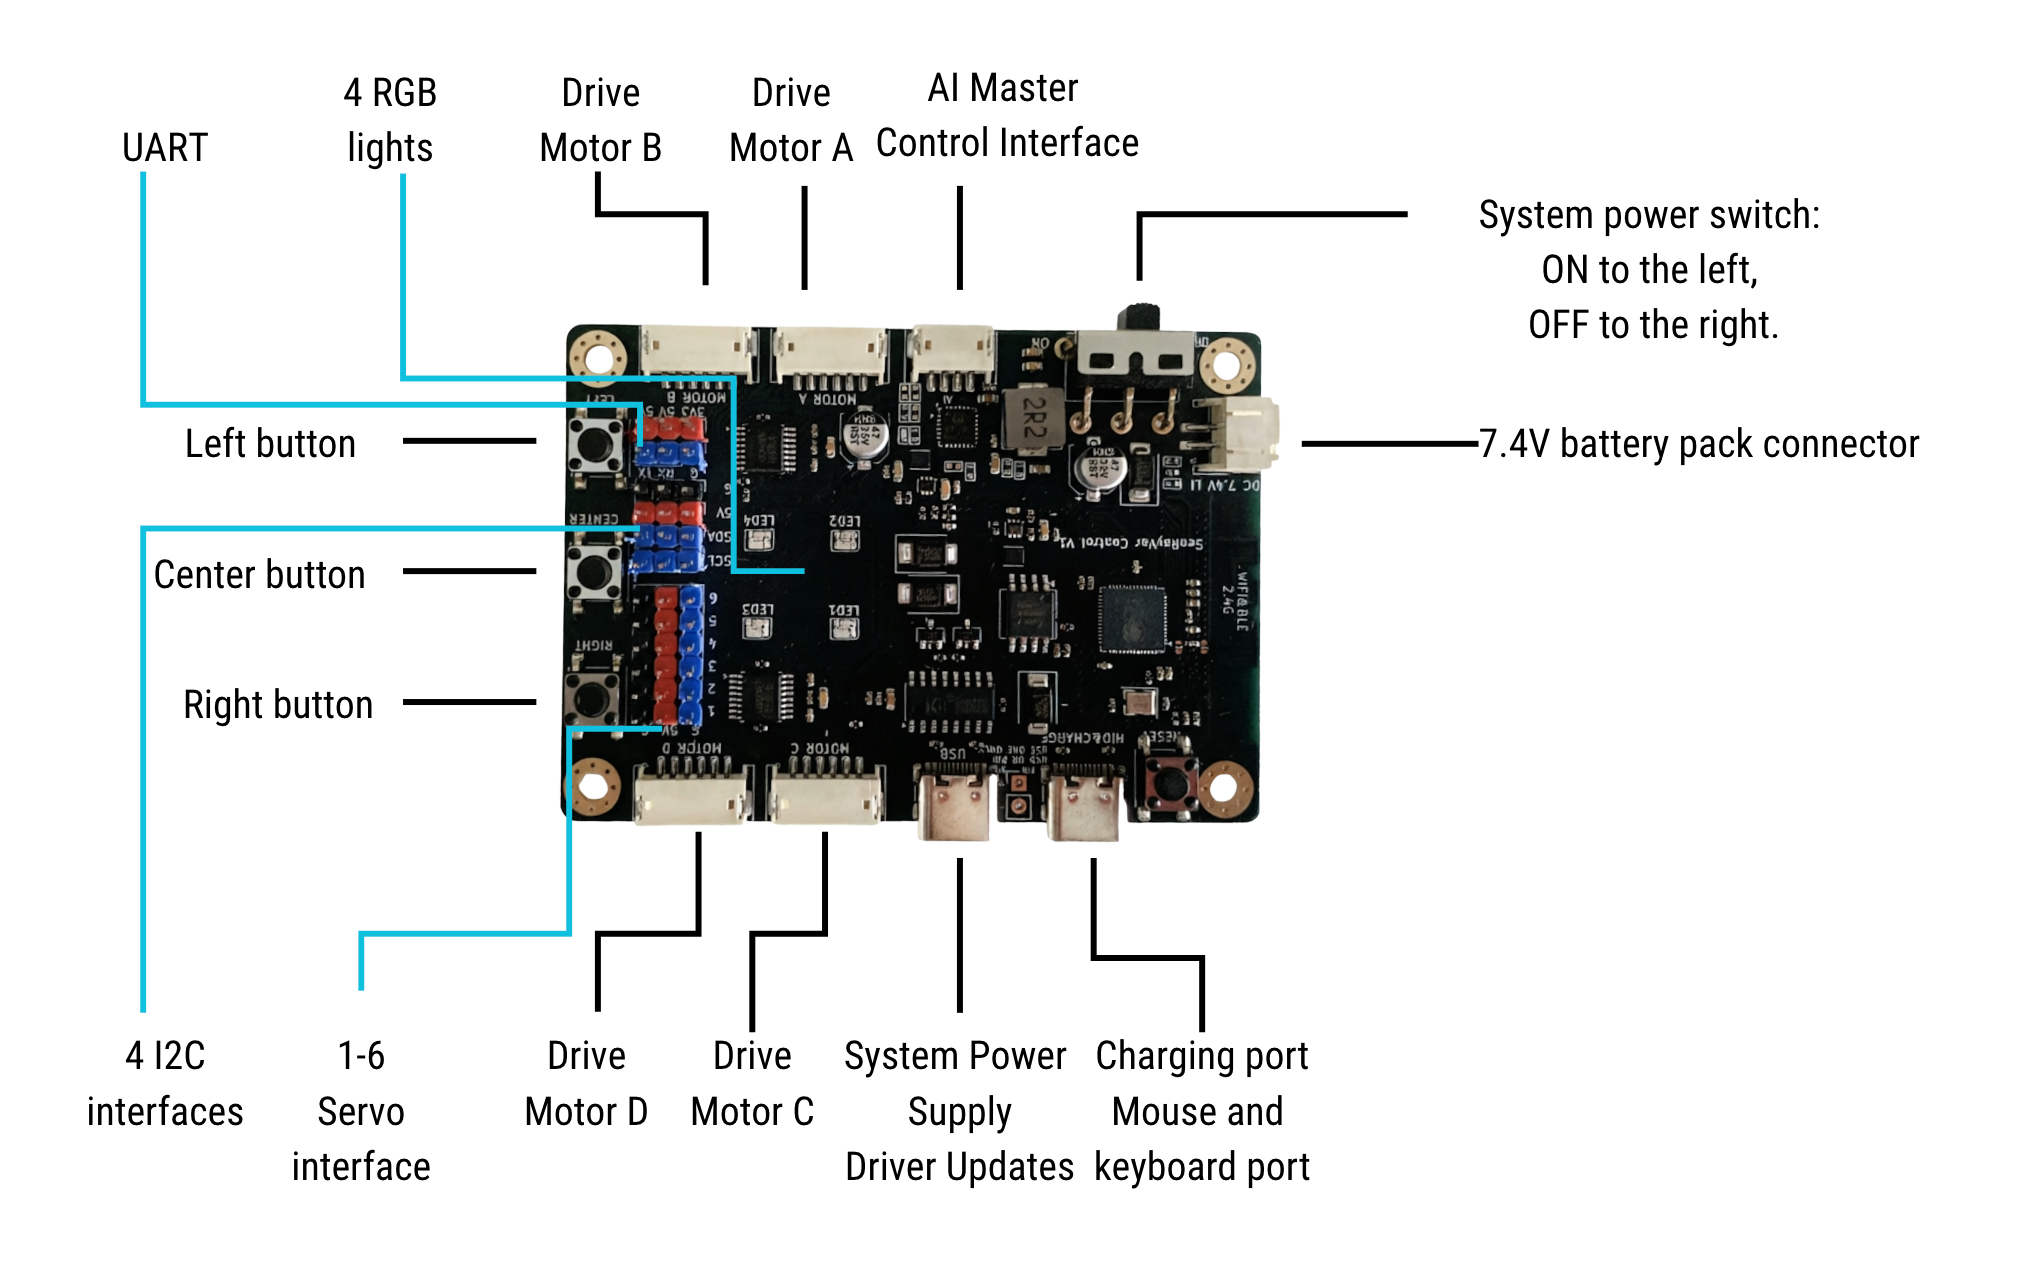
- Motor Ports A / B: Connect left and right encoder motors respectively
- Power Input: Connect to battery holder (6~8.4V)
- AI-Control Input: Links to the mainboard for control signals and encoder feedback
3.3 Chassis and Actuators
- The aluminum alloy chassis has standard mounting holes for encoder motors and the omni wheel.
- Encoder motors provide pulse feedback per revolution, enabling precise speed and distance control.
- The omni wheel allows flexible steering.
Quick Assembly
Refer to the first lesson in the APP/WEB for assembly steps.
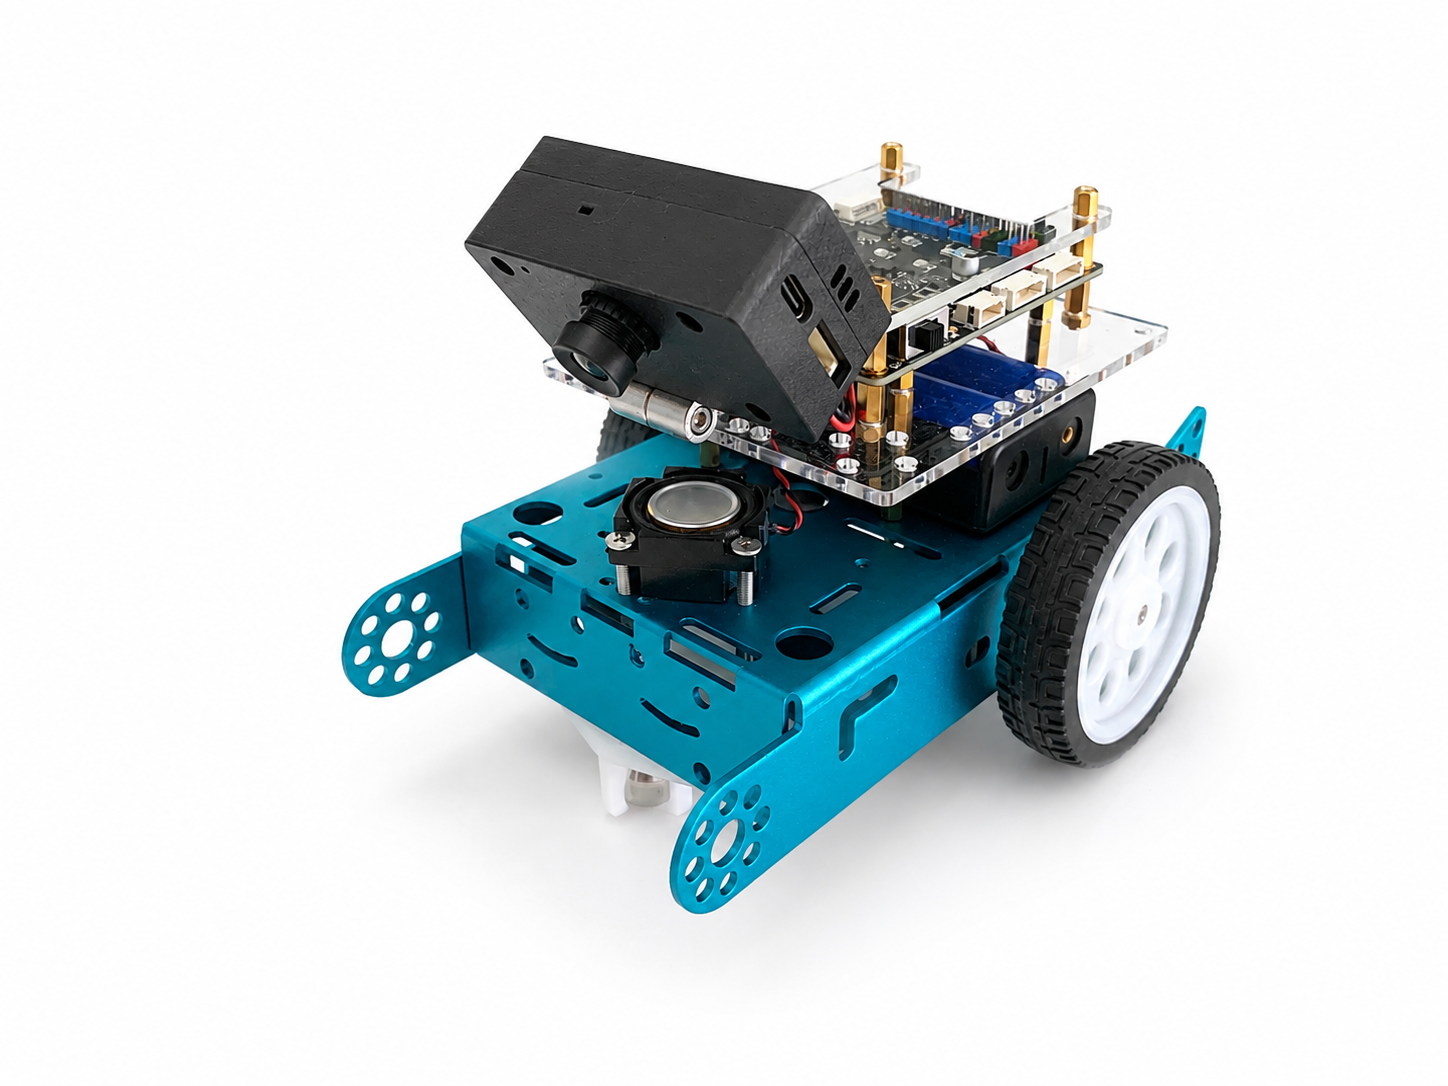
(Photo of the fully assembled car)
Download the APP
This kit supports Scratch block-based programming and Python programming.
- Go to the robot-code.com homepage to download the corresponding app or use the web version directly.
- Turn on the system power switch.
Connection and Usage (Two ways to connect the device)
Method 1: Type-C Connection (Firmware ≥ 1.0.8)
Connect the AI device to your computer using a Type-C cable.
The cable must support data transfer.Open console.robot-code.com in Chrome (recommended).
The first load may take a little longer. Click the red button
A dialog will appear. Select the device shown below
On Windows, the device will appear as COMx.Click the Connect button in the dialog.
If the button turns green, the connection is successful. For other situations, please follow the on-screen instructions.After connecting to the device, go to
Settings → Advance Settings
in the left menu and check the resolution.
- If the resolution matches your computer system, go to Step 5
- Otherwise, select the correct resolution for your system
After selecting the resolution, click the Confirm button at the bottom.
The device will restart automatically.Click
Right panel -> Live
you should see the video stream.
You can also click the Refresh button next to Live to reload the video.
Method 2: Connect Using the APP
Download the APP from the official website.
If you encounter installation issues, please refer to the last section on this page:
REQ – App Installation Issues
If none of the solutions work, your system may not be compatible.
In that case, try connecting with another device.
After opening the app, click the red Bluetooth button → Scan Device.
The device will appear with the default name:
visible-sensorEnter the password (default:
000000)After a successful connection, the button will turn green.
Click the green button again to disconnect.Connect Wi-Fi and display video
After connecting to the device, go to:
Settings → Wi-Fi SettingsThere are two modes:
Normal Mode
- The device only support 2.4G
- The device connects to your router
- Your computer must connect to the same router
Hotspot Mode
- The device acts as a Wi-Fi hotspot
- Your computer connects directly to the device’s Wi-Fi
You can try switching between these two modes.
⚠️ Important:
After switching modes, you must restart the device, otherwise the connection may be unstable.After Wi-Fi is enabled, go to:
Settings → Device InfoCheck the Device IP address and Local IP address.
They must be on the same subnet, otherwise the video stream will not appear.
Right panel -> Live
you should see the video stream.
You can also click the Refresh button next to Live to reload the video.
If the video does not appear after some time, check the following:
a. Resolution
Set the resolution to 800 × 480.
Do not choose a large resolution, otherwise the bandwidth may not be sufficient.b. Check Step 5 again
Make sure the device and computer are on the same network subnet.c. Try Hotspot Mode
Connecting directly to the device hotspot may provide a more stable connection.
Video Tutorials
Watch detailed operation demos and course teaching videos for this kit on YouTube.
Visit our official channel or search for “senrayvar official” to find the full playlist.
Course Cases Reference
Please check the course section in the APP/Web.
FAQ & Troubleshooting
| Problem | Possible Cause | Solution |
|---|---|---|
| Car won't power on | Battery reversed or depleted | Check battery polarity, recharge fully |
| Mainboard cannot connect to computer | USB cable damaged or system frozen | Restart APP or refresh webpage, restart device, replace USB-C cable |
| Camera video lag | Wi-Fi interference | Move closer to the router |
| Motor not spinning | Motor cable loose or driver board power issue | Reconnect motor cables, check battery |
| Driver board yellow light flashing | Battery low | Recharge promptly; the charging indicator turns red and goes off when full |
| Color recognition inaccurate | Large changes in ambient light | Re-set color threshold, keep lighting stable |
| Line following wobbles severely | Proportional parameter unsuitable | Reduce the steering coefficient appropriately |
After-sales Service
- Purchase: official store.
- Technical Support: Visit the official APP/Web for tutorials and firmware updates.
- Warranty: One-year warranty for mainboard and driver board against non-human damage.
This manual is subject to updates; please refer to the electronic version for the latest information. Happy creating!